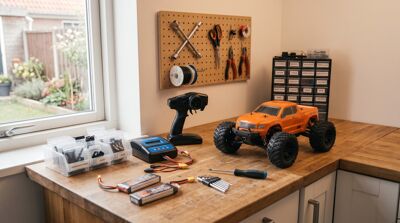
Step 1: Unbox it and take a good look
Open the box, take everything out and lay it all on the table. Grab the manual (yes, really) and check that all the parts are there. Then give the plane a good once-over:
- Are there any dents, cracks or loose parts from shipping?
- Are the wings, tail and landing gear fitted properly and tight?
- Do all the screws and clips sit where they should?
- How does it look before it gets any damage?
Shipping can be rough on a light plane, so it's better to spot a problem on your kitchen table than in the air.
Step 2: Charge your battery (the right way)
Your plane won't do much without power. Charge the flight battery with a good charger and stay nearby while it charges. Never leave a charging LiPo alone, and charge it on a fireproof surface or in a LiPo bag. Also put fresh batteries in your transmitter, or charge the built-in battery.
Want to know more about LiPo batteries? Our guide to RC batteries explains it all.
Step 3: Make sure your radio and plane are talking
Your transmitter and the receiver in the plane need to be "bound" to each other. With some ready-to-fly planes this is already done, with others you do it yourself. The manual tells you how.
Important: always switch on your transmitter first, then plug in the plane's battery. When you're done, unplug the plane first and switch off the transmitter last. Easy rule to remember: transmitter is the first one on and the last one off.
Step 4: Take the propeller off
While you're testing at home, remove the propeller. A spinning prop is sharp and fast, and a motor can start when you don't expect it. Without the prop you can test everything safely. Your fingers will thank you!
Step 5: Check if everything moves the right way
Now the fun part: wiggle the sticks and watch what happens. (Using Mode 2. Your inputs are fliped if it's mode 1)
- Elevator (pull the right stick back towards you): the elevator at the back should go up.
- Aileron (right stick to the right): the right aileron goes up, the left one goes down.
- Rudder (left stick to the right): the rudder moves to the right.
- Throttle: the motor should spin up smoothly (without the prop, remember?).
If something moves the wrong way, don't panic. Most transmitters have a "reverse" setting to flip it. Also check that every control surface is nicely centred when the sticks are in the middle, and that nothing is stuck or loose.
Step 6: Check the balance
A plane needs to be balanced at the right spot, called the centre of gravity (CG). The manual shows exactly where that is. Put the battery in, lift the plane with your fingertips at the CG and see what happens. It should hang level or slightly nose-down. If the tail drops, move the battery forward a bit. A tail-heavy plane is one of the most common reasons for a crash on the first flight.
Step 7: Test the failsafe
What happens if your plane loses the signal? That's what the failsafe is for. Switch off your transmitter while the plane is powered (no prop) and check that the motor stops. If the motor keeps running, set up the failsafe before you go flying.
Step 8: Do a range check
Most transmitters have a range check mode. Ask someone to hold the plane while you walk away, and check that everything still responds. If the controls start acting up, something's wrong with the antenna or the binding. This is the perfect time to find out.
Step 9: Practise without risk
Here's a little secret: most experienced pilots crashed on a simulator first. An RC flight simulator lets you learn the controls on your computer, and crashing costs you nothing more than clicking "reset". Read why in Why an RC Flight Simulator is Every Beginner Pilot's Best Investment.
And if you can, join a local club. Flying with an instructor for your first flights makes a huge difference. Most clubs are happy to help newcomers.
Ready for take-off?
Did everything check out? Then you're ready for the field. Choose a day with little wind, put the prop back on, do one last check and enjoy the moment. There's nothing like that first take-off.
Want a handy checklist for the field? Read Before your first flight: how to check your RC aeroplane.
Got stuck somewhere, or not sure if something's right? Just pop by the shop in Bruges or send us a message. We're always happy to take a look with you. Happy flying!